HPE Configuration
Follow the steps below to set the color scheme, logos and webhook URLs for the HPE payment iFrame and receipts:
-
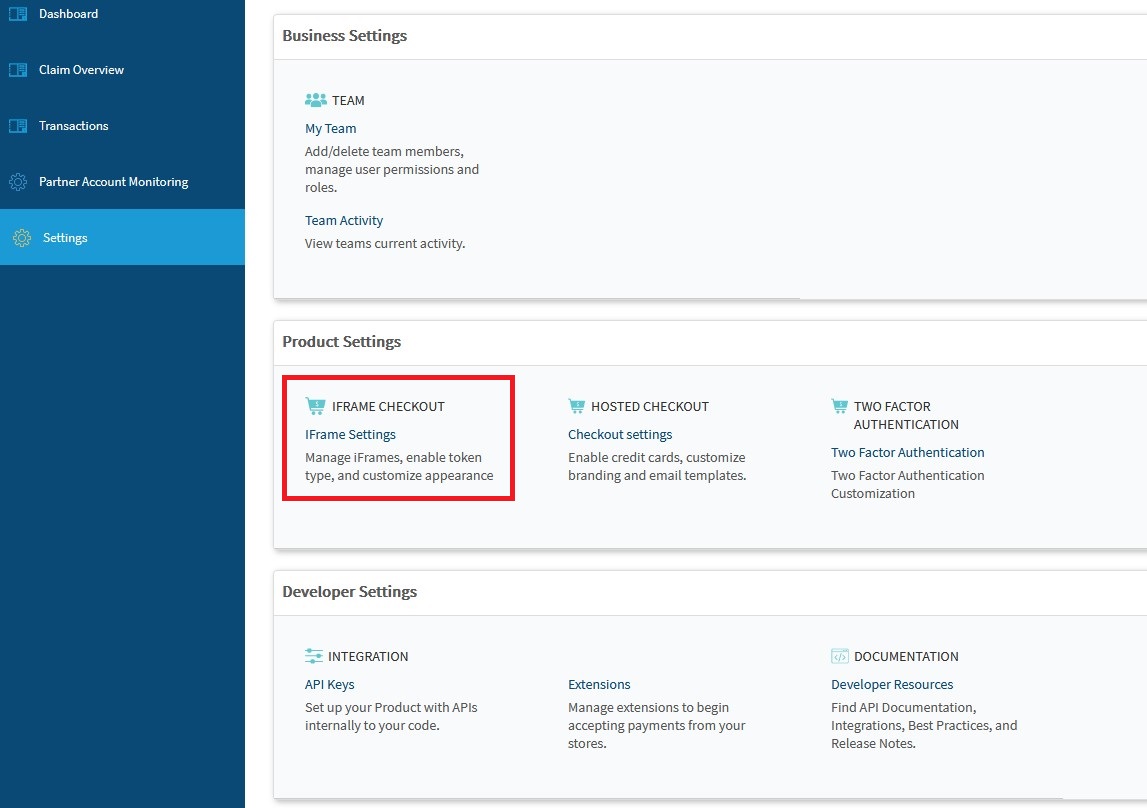
Log into your vPortal account and select Settings from the left hand navigation. Then click on iFrame Settings in the Product Settings section to open the HPE configuration page:
-
Click the CREATE IFRAME button in the iFrames Settings panel, shown below:
-
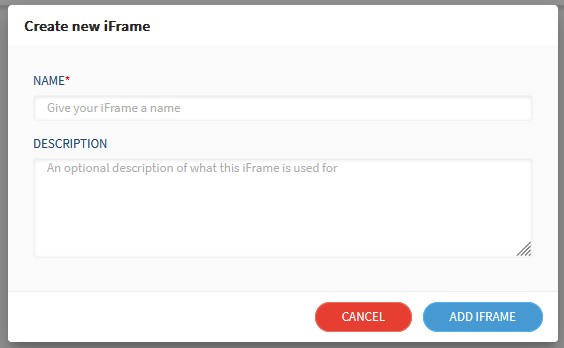
The Create new iFrame popup, shown below, opens. Set a name and add a description for the iFrame. Then click the Add IFRAME button:
-
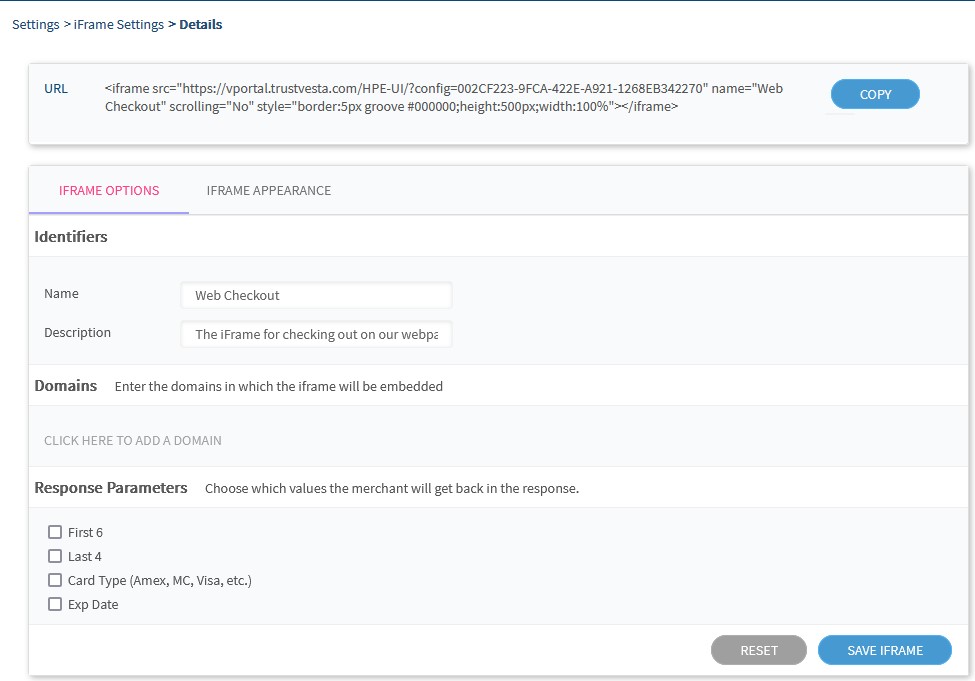
The iFrame Settings > Details window opens, as shown below:
-
Add or update the following information in the IFRAME OPTIONS tab:
- Name and Description - The iFrame name and description that you entered when you created the new iFrame in the previous step. You can edit these values at any time. The Name value is used in the HTML that Vesta generates for the iFrame so that you can identify it on your webpage.
- Domains - Add the domain that will display the iFrame. Vesta will ensure that the iFrame can only be displayed on domains listed here. This feature blocks fraudsters from using this code in rogue web pages to collect credit card details.
- Response Parameters - Select the values that you want to receive in the JSON returned by the HPE: the first 6 and/or last 4 digits of the card number, the card type, and the expiration date. Depending on your setup, you may send some of these values to Vesta for payment using the
chargePaymentRequestAPI endpoint or for fraud analysis using theChargePaymentFraudRequestAPI.
-
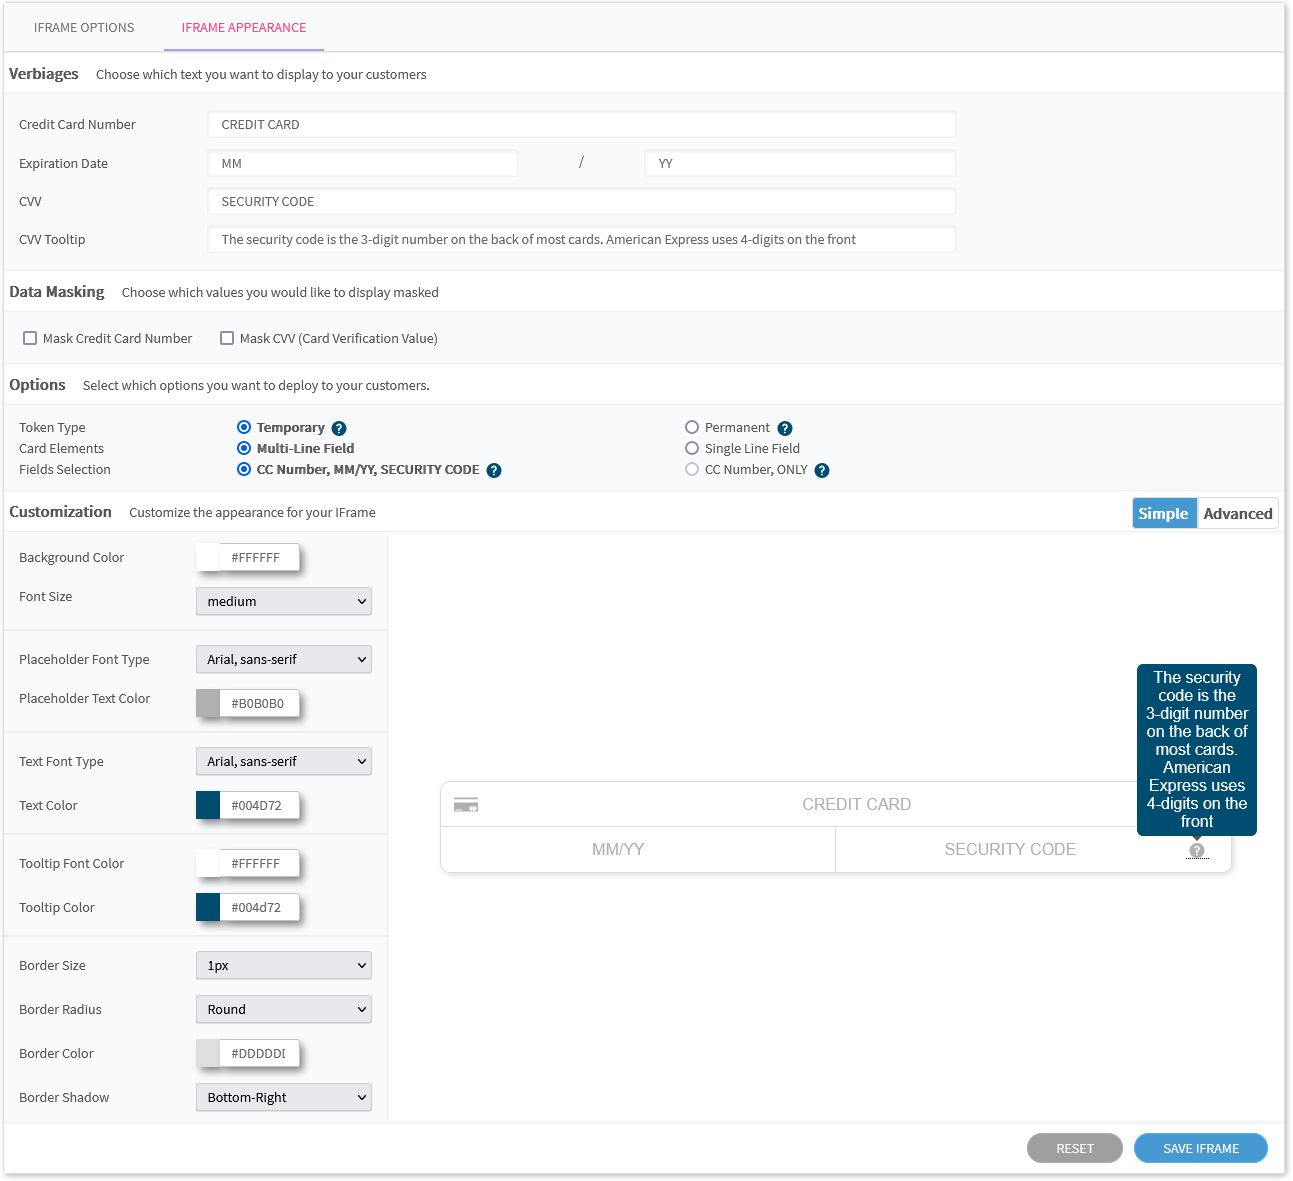
Click on IFRAME APPEARANCE to customize the appearance and behavior of the iFrame. The image below shows the IFRAME APPEARANCE tab:
-
Set values for the options described below. The example form in the lower right of the IFRAME APPEARANCE tab will update in real time:
- Verbiages - Define the labels and content that will be displayed on the payment form.
- Data Masking - Select whether the card number and CVV will be masked when the customer enters the data into the form.
- Options - The options settings apply to how you will use the payment token generated from the form:
- Token Type - Use a temporary token to accept a one-time payment. Use a permanent token if you expect your customers to submit additional payments using this payment method. Permanent tokens are useful for recurring payments like subscriptions and automatic bill pay.
- Card Elements - Select whether the payment form will be displayed on multiple lines or on a single line. If you are creating permanent tokens, the multi-line option is not available.
- Fields Selection - Select whether the payment form will collect the card number, expiration date and CVV, or if it will collect only the card number. For one time payments using temporary tokens, you can choose to collect the expiration date and CVV using your own form. Permanent tokens can only be generated using the card number, and the expiration date and security code values will need to be sent in the
chargePaymentRequesteach time you use it.
-
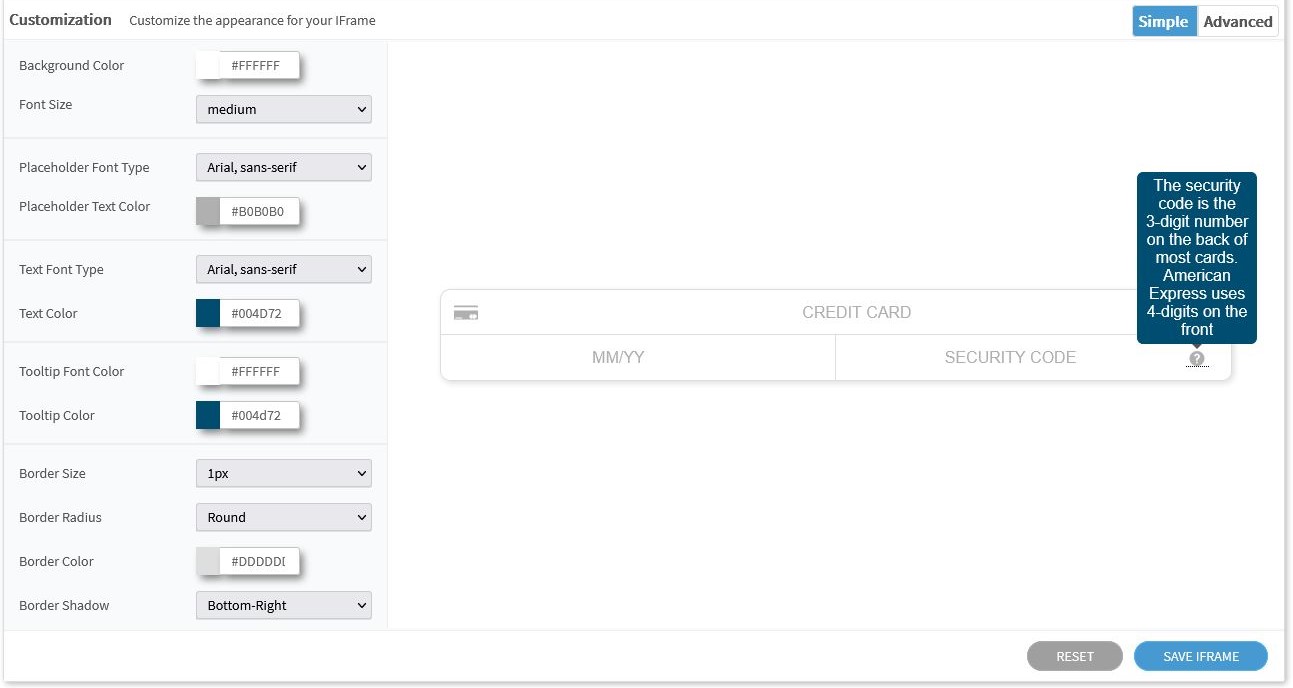
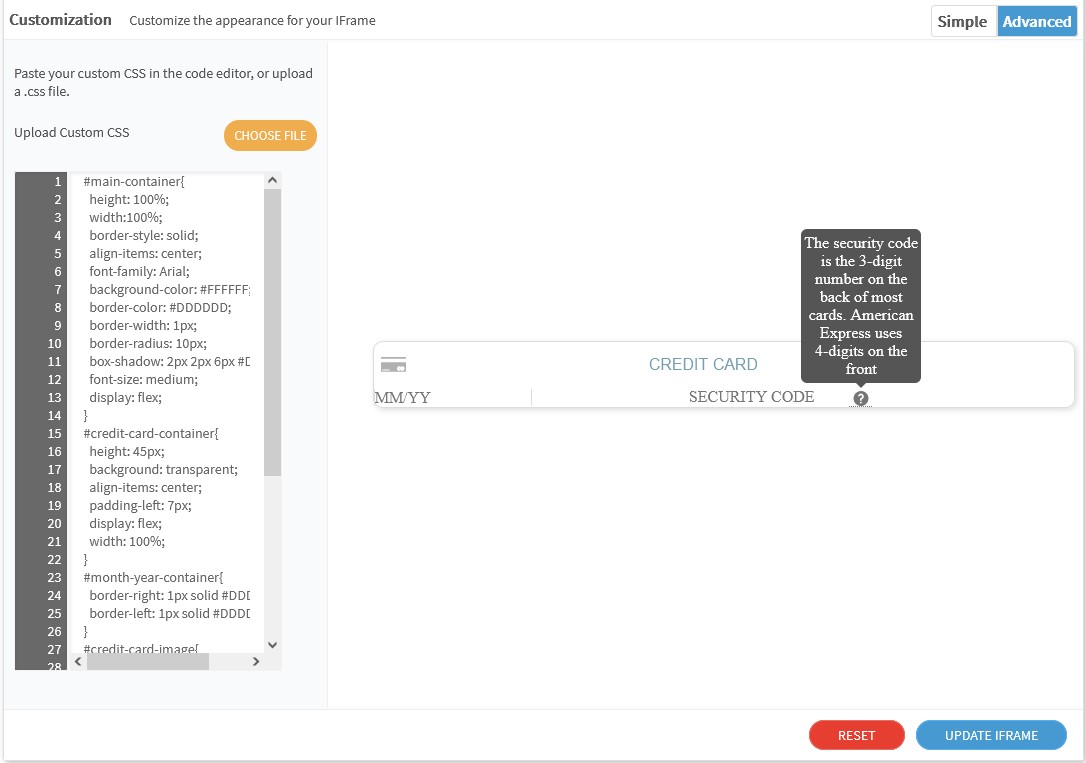
In the Customization panel, edit the look and feel of the payment form using the Simple or Advanced options:
-
Simple - Use the color pickers and menus, shown in the image below, to set color, font, and border elements to match your branding:
-
Advanced - Click Advanced to view and modify the CSS that controls the look and feel of the payment form. The Advanced options support directly editing or uploading your own CSS. The sample payment form updates when you modify the styles. The image below shows the CSS editor:
-
-
Click the SAVE or UPDATE IFRAME button. The HTML in the URL field at the top of the page will update if needed. Copy the HPE HTML and move on to the Integration portion of the HPE implementation.
